Using the Shared MLflow Tracking Server with Maxwell
MLflow allows you to track, evaluate, and monitor LLM applications, agents, and machine learning models. It manages the full LLMOps and MLOps lifecycles, ensuring each development phase remains manageable, traceable, and reproducible.
Note: This guide applies only to users connecting to the shared MLflow tracking instance to share experiments, models, artifacts, etc. with colleagues. If you are running an isolated, single-user local instance of MLflow, you can skip this documentation.
Connecting to the Server
Access the central MLflow service via the dedicated web portal: https://mlflow.desy.de.
Navigating the Interface
Once you successfully log in using your Maxwell account, you will see the main dashboard interface.
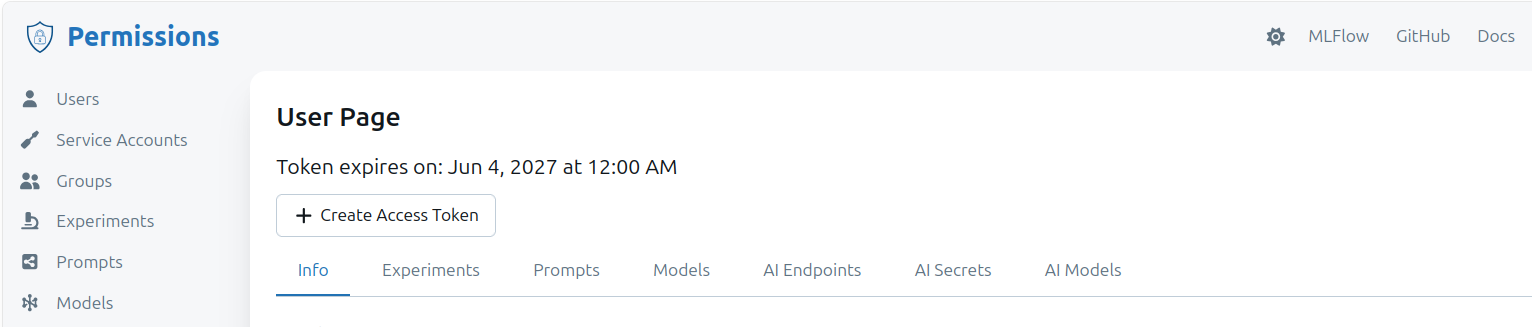
- Select MLflow from the top menu.
- Choose Model Training to view shared example ML experiments.
- You can now explore experiments shared by your colleagues, such as the example project:
Maxwell-mlflow-pytorch_all.
Set up a Config File on Maxwell
For workloads on Maxwell to communicate with the external MLflow tracking server, you need to copy and modify the .env file within Maxwell (the copied mlflow directory also contains example scripts for later use):
  cp -r /software/spack/examples/mlflow   ~/
  cd  mlflow  &&  nano .env
Edit the last two lines to add your credentials: set your email as the tracking username and your access token as the tracking password. You can generate an access token and set its expiration date on the permissions page, as shown in the image above (click +Create Access Token to generate a new one). Note that creating a new token will automatically invalidate the previous one
  export MLFLOW_TRACKING_USERNAME=your_email
  export MLFLOW_TRACKING_PASSWORD=your_access_token
Run your ML / GenAI on Maxwell
Run your compute-intensive workloads on Maxwell. By adding a few lines of code to your script, you can log parameters, metrics, and artifacts to an external MLflow server. To do this, simply set the tracking URI to your MLflow server's URL in your code.
Here is a basic example (mlflow_test.py). You can also find PyTorch and scikit-learn implementations adapted from the MLflow Documentation in the /software/spack/examples/mlflow directory (mlflow_pytorch.py and `mlflow_sklearn.py).
import mlflow
from dotenv import load_dotenv

load_dotenv()
mlflow.set_experiment("Maxwell-Test")

with mlflow.start_run():
    mlflow.log_param("lr", 0.01)
    mlflow.log_metric("acc", 0.95)
1. Activate the MLflow client environment
Choose one of the following methods:
Using your Python environment (e.g.)
source /software/spack/mlflow/bin/activate
Using the Spack environment
spack env activate mlflow-p
2. Run the script
After activating the environment, execute the following command on the login node:
python mlflow_test.py
With these, you'll be able to see the logged results on mlflow server.
See an example slurm script mlflow_slurm.sh to use compute nodes (ofcourse!).
Set Permissions on Experiments
When you create a new experiment (e.g., Maxwell-Test), its initial permission state is NO_PERMISSION. This means other users and groups cannot view, read, or edit it.
You can grant READ, EDIT, MANAGE, or other access roles to specific users and groups by following these steps:
- Navigate to the Permissions page.
- Select the Experiments tab.
- Hover over the experiment name you want to share.
- Click Manage Permissions.
- Select +Add group (for a group) or +Add (for an individual user).
- Assign the desired permission level and click finish.
For a full list of access levels, see the MLflow-OIDC Permissions documentation.